
NBI Clearance Appointment Online 2026: Complete Booking Guide
The exact booking steps, the two-ID rule NBI repeats but rarely explains, real fees, and what actually happens once you’re at the branch.
Book your appointment at clearance.nbi.gov.ph by logging in, applying for clearance, selecting a valid ID, choosing your branch and time slot, then paying to get your reference number. Treat that reference number like a gate pass. Two valid government IDs are mandatory — NBI’s own messaging says it plainly: no ID, no appointment.
Mandatory, no exceptions
Realistic total fee
Release if no HIT
Accepted ID types
We are not affiliated with the NBI. Official website: clearance.nbi.gov.ph. Last verified July 2026.
This is an independent guide, not the National Bureau of Investigation. Book your actual appointment only at clearance.nbi.gov.ph. Where a detail varies between applicants or branches, we say so directly instead of guessing.
Quick answer: how to book an NBI Clearance appointment online
You book your NBI Clearance appointment by registering or logging in at clearance.nbi.gov.ph, applying for clearance, selecting a valid ID, choosing your branch and preferred date and time, then paying the fee to receive a reference number. That reference number is what gets you through the door on your appointment day, so treat it like a gate pass rather than just a receipt.
The part most guides gloss over is this. Two valid government issued IDs are required to even get an appointment. NBI’s own public messaging states it plainly: no ID, no appointment. If you only have one valid ID or the wrong type, you can complete every online step and still get turned away at the branch, so we will walk through exactly which IDs count before anything else.
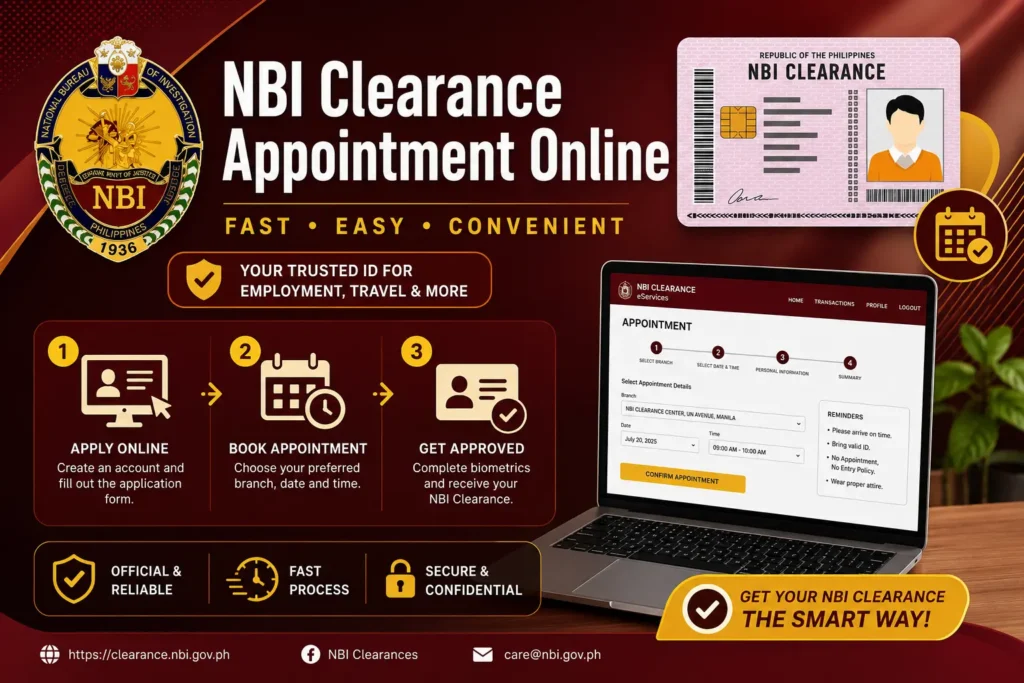
Who Actually Needs to Book an Appointment
Not everyone booking an appointment is in the same situation, and the path you take depends on which one you are.
First time applicants. You have never had an NBI Clearance before, or your previous one predates the online system. You will register a brand new account and go through the full profile setup.
Renewing applicants. You already have a clearance, typically issued 2014 or later, and you are requesting an updated copy. Your existing record speeds things up, though you may still need an appointment for biometrics depending on your specific case. Our complete renewal guide covers this path in full detail.
Applicants updating personal details. Your civil status changed, you have a new address, or another non identity affecting detail needs correcting. This usually still allows you to proceed through the standard appointment flow rather than starting completely over.
Applicants needing a correction. Something on a previous record was wrong, whether a misspelled name or an incorrect birthdate, and you need this fixed as part of a new transaction.
Applicants with a HIT on a previous or current transaction. If your name matched something in the database, you may be asked to book a specific verification appointment rather than a standard one. We cover exactly what this involves later in this guide.
The Two ID Rule: What NBI Actually Requires Before Booking
This is worth stating clearly upfront because it is easy to miss and expensive to ignore. NBI’s own public communications repeat this rule consistently: you need two valid government issued IDs, and without them, you do not get an appointment.
It has appeared as a direct, repeated statement from NBI’s own channels, worded almost exactly the same way each time: two valid IDs are required, no ID, no appointment. Treat it as a hard requirement rather than something you can work around at the branch.
Valid IDs Accepted
- UMID or GSIS ID
- Passport
- National ID (PhilSys)
- PhilHealth ID
- Voter’s ID or Certificate of Registration
- BIR issued ID
- PRC license
- PSA authenticated birth certificate
- Driver’s license
- Pag-IBIG ID (loyalty cards do not count)
- Postal ID
- Certification from your local civil registrar
- Solo Parent ID
- Company ID
- Seaman’s book
- School ID with current registration card
- Senior Citizen ID
- MARINA issued ID
IDs That Will Not Work
Two IDs come up repeatedly as rejected at the counter, so it is worth being direct about them. A company ID by itself is frequently turned away as insufficient on its own. A barangay ID or barangay clearance is also not accepted as a valid ID for this purpose, though it plays a completely different role for first time job seekers specifically, which we explain in the requirements section below.
If your only IDs are a company ID and a barangay document, you do not actually have two valid IDs by NBI’s standard, even though it may feel like you do. Check this before you book anything.
Step by Step: How to Book Your NBI Clearance Appointment Online
The interface gets refreshed periodically, so minor button placements may shift, but this sequence has held consistent.
Go to clearance.nbi.gov.ph directly
Type the address into your browser rather than clicking a link from social media, a message, or a search ad. Fake look alike pages exist, and typing the address yourself is the safest way to be certain you are on the real site.
You will land on a data privacy consent screen. Choose your language and click I Agree, then close the advisory that follows.
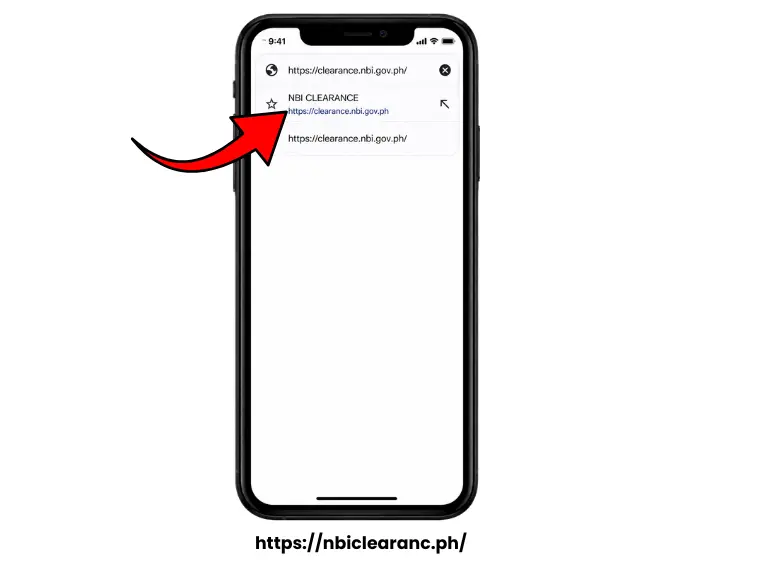
Log in or register
If you already have an account, sign in with your email and password. If you are a first time applicant, register a new account using your own active email and mobile number, since both are needed for verification steps that follow.
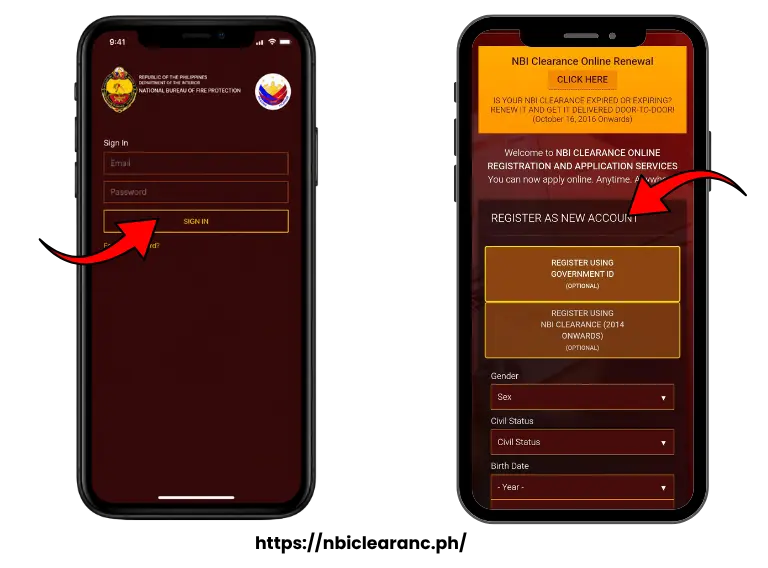
A small but genuinely useful detail here: if the phone number or email field shows a warning symbol next to it, this usually means either the format is wrong or that contact detail is already tied to another account. You cannot proceed until this clears, so double check for typos or try a different number or email if the issue persists.
Complete your profile if you have not already
Fill in the required fields, including your complexion, identifying marks if any, and family background details. If any of this feels unfamiliar, our complete requirements guide walks through what each field is actually asking for.
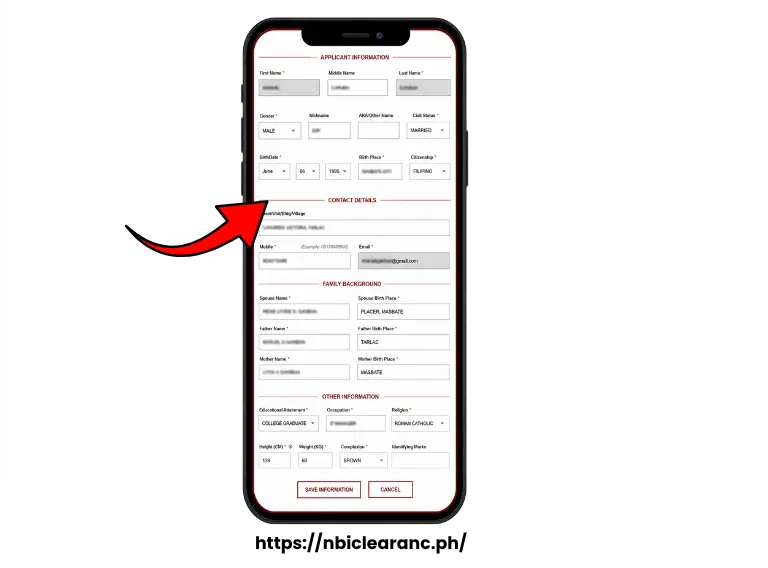
One warning worth repeating clearly because multiple applicants have run into this after the fact: your full name and birthdate typically cannot be edited once you save your profile for the first time. Review these two fields with extra care before submitting, since correcting them afterward is a much bigger hassle than getting them right the first time.
Click apply for clearance
From your account dashboard, select apply for clearance. A window will ask you to choose your ID type and enter the ID number. Pick whichever valid ID from the accepted list above you plan to physically bring with you, since this is the exact document staff will check against your application.
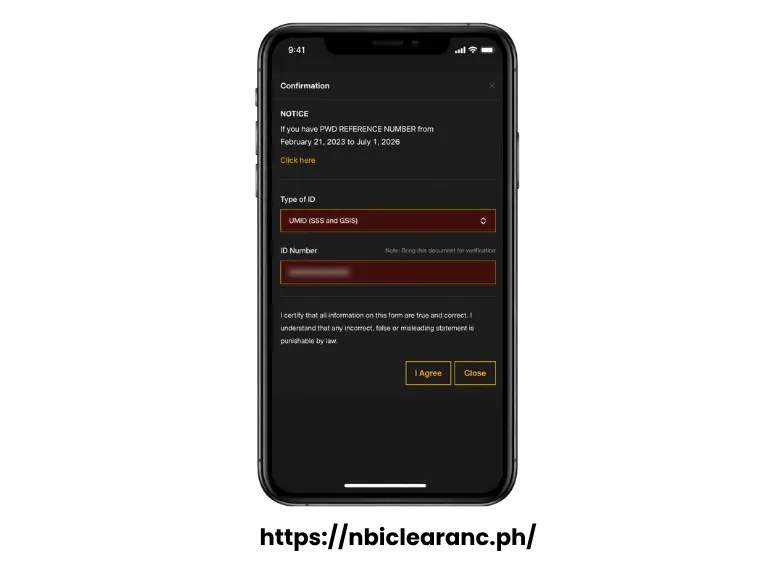
Choose your NBI branch
Select the branch most convenient for you. This does not have to be the main office. Satellite branches inside malls and district offices exist specifically to spread out demand, and NBI has publicly promoted mall based processing locations as legitimate, fully functioning alternatives to the main branch.
If your first choice branch has limited availability, checking a nearby satellite location is often faster than waiting for a slot to open at a busy main office.
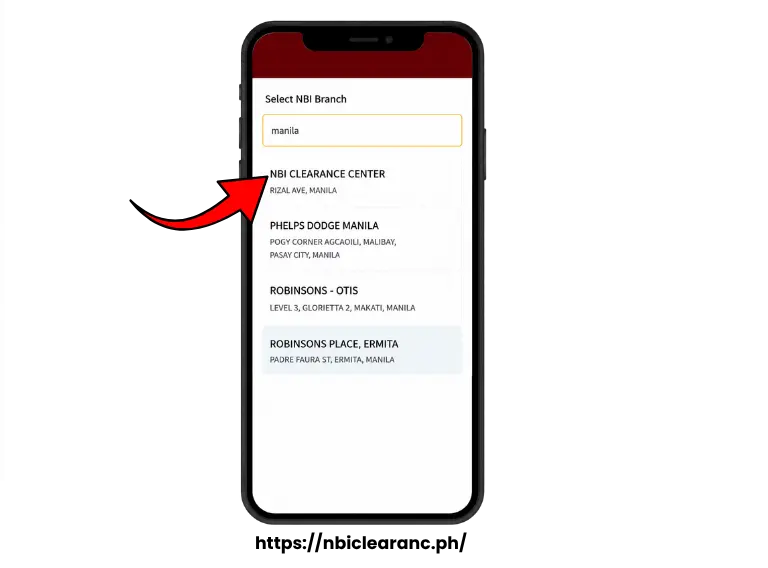
Pick your date and time
A calendar will display. Blue dates generally indicate availability. Red dates typically mean the branch is closed that day, whether for a holiday or another reason, not simply that slots are full.
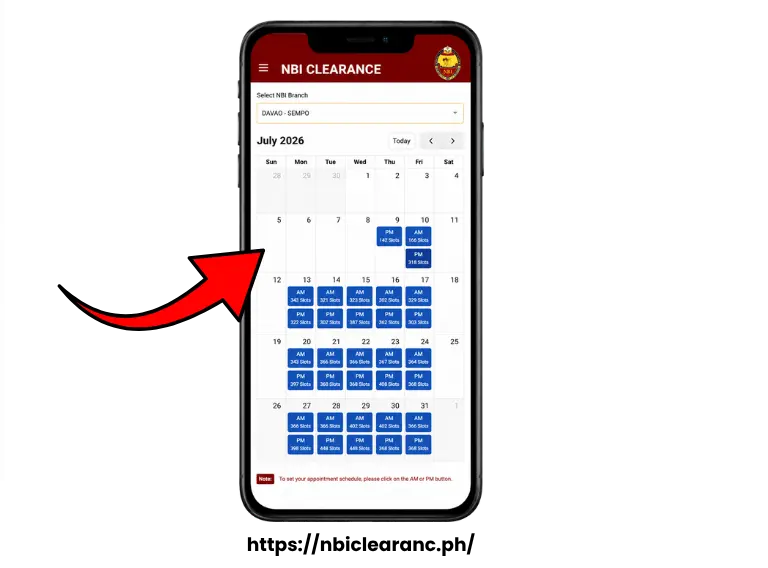
Set realistic expectations here. In busier cities, the very next available slot can sometimes be several days out rather than the next day, particularly outside Metro Manila. If your need is urgent, checking multiple nearby branches rather than fixating on one location can meaningfully shorten your wait.
Pay your fee
Choose from the available payment channels, which typically include GCash, Maya, bank transfer, over the counter options, and convenience store payment through partners like 7-Eleven. Once you select a method, the system generates your reference number.
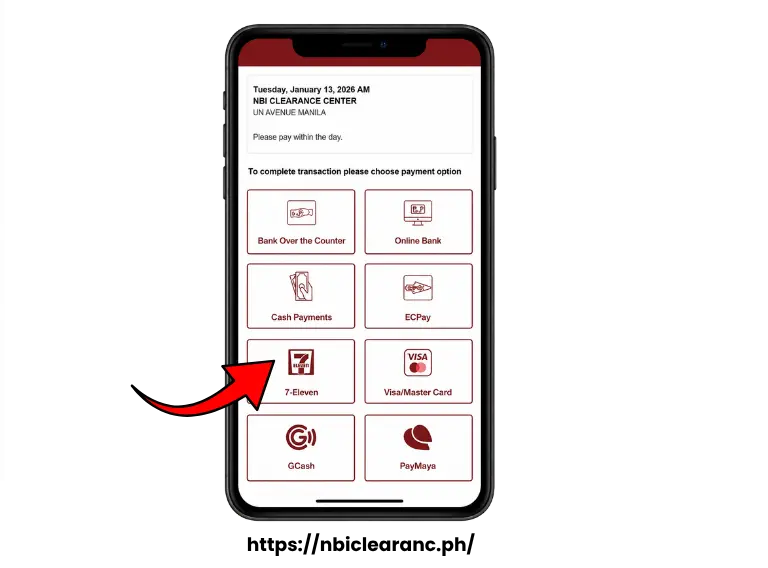
Screenshot this reference number immediately, before clicking any confirm or accept button that follows. The screen can change quickly once you proceed, and having this saved separately protects you if anything interrupts the process afterward.
Verify your payment reflected
After paying through your chosen channel, return to your transactions page and confirm the status has changed from pending to paid. This can take anywhere from a few minutes to a couple of hours depending on the payment channel, so do not panic if it is not instant.
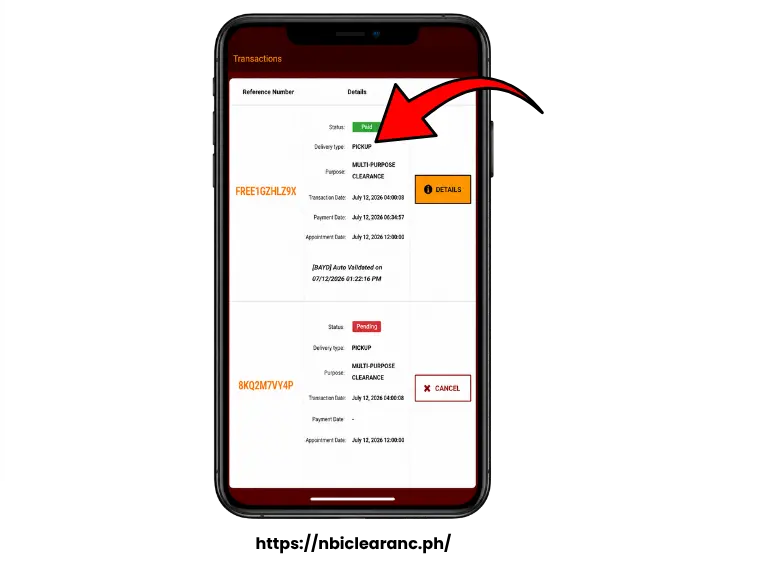
If you ever see your status marked as paid before you have actually completed payment, this appears to be an occasional display quirk in the system rather than something you caused. Do not skip payment based on this. Complete your payment through your chosen channel regardless of what the status briefly shows, and follow up with NBI directly if the discrepancy does not resolve itself once your real payment goes through.
What to Bring on Your Appointment Day
This is a short list, but missing any single item on it can mean turning back and rebooking.
- Your reference number, either printed or as a screenshot on your phone.
- Two valid government issued IDs, the same type and number you entered online.
- Your payment receipt or confirmation, if your chosen payment channel provided one separately from the reference number.
On the specific question of whether you need to print your reference number or whether a screenshot is enough, a digital copy on your phone is generally accepted at most branches. If you want extra peace of mind, particularly for a branch you have not visited before, printing a physical copy as backup costs little and removes any doubt.
Fees: What You Will Actually Pay
The base NBI Clearance fee has been consistently reported around 130 pesos. On top of that, a service or e-payment charge applies depending on your payment channel, and this is where a small amount of genuine variation shows up across different reports.
Base fee
Service charge
Realistic total
Possible final charge
Most reports place the additional service charge somewhere between 25 and 30 pesos, bringing your realistic total to somewhere between 155 and 160 pesos for most payment methods. A small additional charge of around 5 pesos has also been reported appearing at the very final confirmation step for some transactions, which appears to be a minor processing adjustment rather than a separate hidden fee.
The honest takeaway is that your exact total will always be clearly displayed on screen before you confirm payment, so you will never be charged a surprise amount you have not already seen and agreed to. If the number shown is a few pesos different from what a friend or a video described, this is normal variation between payment channels rather than a sign that something is wrong.
For a complete breakdown of every payment method and how each one works, see our dedicated fees guide.
What Actually Happens at the NBI Branch
Knowing the sequence in advance takes a lot of the anxiety out of appointment day.
Document verification. Staff check your reference number and valid ID against your online application to confirm everything matches.
Biometric capture. Your fingerprints are scanned, typically all ten, and your photo is taken on site.
Database check. Your details are run against the NBI record system to check for a HIT, which is simply a name or detail that potentially matches an existing entry closely enough to need a closer look.
Clearance issuance. If no HIT comes up, your clearance is typically processed and released the same day, often within a fairly short window after your biometrics are completed. You will usually receive two copies, one intended for official use and one for your own personal records.
You are not denied outright. You will be given a return date for verification, which has been reported taking roughly a week in many cases, though this can vary depending on the specifics of your record. For a full breakdown of what a HIT means and exactly what happens during verification, see our dedicated guide on NBI Clearance HIT status.
Choosing the Best Time to Go
Here’s a tip that might surprise you.
Common assumption says arrive early in the morning to beat the crowd. At least one detailed firsthand report from an applicant at the UN Avenue Manila branch described the opposite experience, saying that arriving in the afternoon, roughly 40 minutes before closing time, resulted in notably fast processing.
We want to be upfront that this is one specific, real experience tied to one specific branch, not a universal rule confirmed across all locations. Foot traffic patterns can vary significantly by branch, by day of the week, and by season. If your schedule is flexible, it may be worth experimenting with a later appointment slot rather than assuming early morning is automatically your fastest option, particularly at busier branches.
Common Problems During Appointment Booking and How to Fix Them
|
Problem |
What Is Likely Happening |
|---|---|
|
Warning symbol on phone or email field |
Wrong format, or that contact detail is already linked to another account |
|
Transaction fails to process during payment |
Reported as a temporary system issue rather than a problem with your account specifically |
|
Status shows paid before you have actually paid |
An occasional display quirk in the portal |
|
No appointment slots available at your preferred branch |
High demand at that specific location |
|
Missed your scheduled appointment |
If payment was not completed, the appointment is typically canceled automatically |
|
Uncertain whether to print or screenshot your reference number |
Both are generally accepted, but this causes real confusion |
|
Got a HIT after your appointment |
Name or detail flagged for manual verification, not a confirmed criminal record |
A Note on Scams and Fake Links
This deserves direct mention because it has caught careful, experienced internet users off guard, not just first timers.
Watch the domain name closely on any link you click, including activation emails sent after you register. The only official domain is clearance.nbi.gov.ph. Links using different extensions or slightly altered domain names have circulated and can lead to pages designed to look convincing at a glance. If anything about a link looks even slightly different from what you expect, do not click it, and instead navigate to the official site directly by typing the address yourself.
This same caution applies to any Facebook page or group offering to guarantee faster processing, skip appointments entirely, or bypass verification for a fee. Legitimate processing does not work this way, and these offers put both your money and your personal information at risk.
Frequently Asked Questions About NBI Clearance Appointments
A Few Final Things Worth Remembering
Booking your NBI Clearance appointment is genuinely straightforward once you know two things in advance: which two IDs you are bringing, and what to do if the reference number screen changes faster than you expect. Most of the friction people report comes down to one of a small number of predictable moments, a missing second ID, an unclear payment status, or a fully booked preferred branch, and each of these has a clear enough workaround once you know it exists.
If your situation involves a HIT, a needed correction, or an application from abroad, those paths branch off from what is covered here, and our dedicated guides on each of those topics go into the specific detail those situations deserve.
This guide will be updated as the portal or requirements change. If something here no longer matches what you experience on the actual site, that mismatch matters to us, since staying accurate is the entire reason this page exists.